Complete Guide to Receiptify: How to Create Spotify Receipts in 2024
Introduction
If you’re a Spotify user who loves sharing your music taste with friends, you’ve probably heard about Receiptify. But what exactly is it? How do you use it? Is it safe? In this comprehensive guide, we’ll answer every question you have about this viral tool that’s taking the music world by storm.
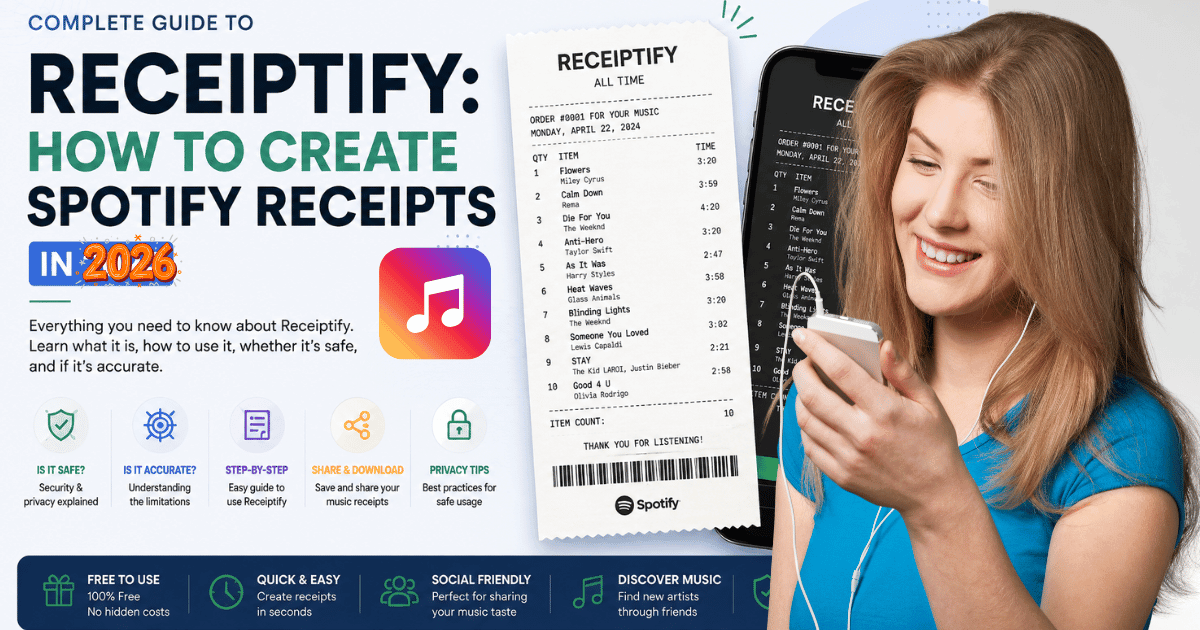
Whether you’re wondering “what is receiptify,” “how to make receiptify on Spotify,” or “is receiptify safe,” you’ll find all the answers you need right here. Let’s dive in!
What is Receiptify? (Explaining the Phenomenon)
Understanding Receiptify Basics
Receiptify is a web-based tool that transforms your Spotify listening history into a visually appealing receipt-style image. Think of it as a shopping receipt, but instead of items you’ve purchased, it displays the songs you’ve been listening to on Spotify.
The tool connects to your Spotify account, pulls your recently played tracks, and generates a formatted receipt that looks like you’ve “purchased” those songs. It includes:
- Song titles
- Artist names
- A timestamp
- A playful receipt format
This creative format has made it incredibly popular for social media sharing, especially on platforms like Instagram, TikTok, and Twitter/X.
Why is Receiptify So Popular?
The popularity of Receiptify stems from several factors:
- Visual Appeal – The receipt format is unique and eye-catching
- Social Sharing – It’s perfect for showing off your music taste
- Easy to Use – No technical skills required
- Free Service – Completely free to generate receipts
- Nostalgia Factor – The receipt design brings back memories of actual shopping receipts
- Music Discovery – Friends can discover new artists through your shared receipts
Is Receiptify Safe? Security & Privacy Concerns Addressed
Safety Verification
Yes, Receiptify is generally safe to use. Here’s what you need to know:
Authentication Method:
- Receiptify uses official Spotify API integration
- You authenticate through Spotify’s secure login
- The app doesn’t store your password
- All data transfer uses secure HTTPS protocols
Data Handling:
- Receiptify only accesses your listening history
- It doesn’t modify your playlists or account settings
- It cannot access your personal information (email, phone number, payment details)
- The app only reads publicly available listening data
What Receiptify CAN’T Do:
- ❌ Change your password
- ❌ Access payment information
- ❌ Delete playlists
- ❌ Add followers without your permission
- ❌ Share content you don’t want shared
- ❌ Access your full profile information
Privacy Best Practices When Using Receiptify
To maintain maximum privacy while using Receiptify:
- Review Permissions – Always check what permissions you’re granting
- Disconnect After Use – You can revoke Receiptify’s access from your Spotify account settings
- Don’t Share Links – Only download and share the image, not the Receiptify link
- Check Privacy Settings – Ensure your Spotify listening status isn’t publicly visible if you prefer privacy
- Use on Secure Network – Access Receiptify on a secure, private internet connection
Steps to Revoke Access:
If you want to remove Receiptify’s access to your Spotify account:
- Log into your Spotify account
- Go to Settings → Apps
- Find “Receiptify”
- Click “Remove Access”
Is Receiptify Accurate? Understanding Its Limitations
Accuracy of the Tool
Receiptify is accurate, but with important caveats:
What Receiptify Accurately Shows:
- ✅ Your most recently played songs (from the last 24-48 hours typically)
- ✅ Correct artist names and song titles
- ✅ Accurate play timestamps
- ✅ Current listening data from your Spotify account
Accuracy Limitations:
- The receipt shows your most recent songs, not necessarily your most-listened-to tracks
- It captures a snapshot in time; older listening data won’t appear
- If you’ve been inactive on Spotify, it may show songs from several days ago
- Spotify skipped songs still count as “played” depending on settings
Why the Data Might Seem Inaccurate
- Time Window – Receiptify shows recent activity, not all-time stats
- Refresh Rate – Spotify may take time to update listening data
- Background Plays – Songs playing in background apps count toward your history
- Skipped Tracks – If you skip after 1-2 seconds, it might still register in history
- Playlist Updates – Spotify’s tracking updates periodically, not in real-time
How to Use Receiptify: Step-by-Step Guide
Method 1: Using the Official Receiptify Website
Step 1: Visit the Website
- Go to receiptify.herokuapp.com (or your preferred Receiptify domain)
- You’ll see the main page with a “Login with Spotify” button
Step 2: Click “Login with Spotify”
- You’ll be redirected to Spotify’s authentication page
- Log in with your Spotify credentials if you’re not already logged in
Step 3: Grant Permissions
- Review the permissions (Receiptify only needs read access to your listening history)
- Click “Agree” or “Allow” to grant access
Step 4: Generate Your Receipt
- The tool will automatically pull your recent listening history
- Your receipt will display immediately
- You’ll see a visual receipt showing your recently played songs
Step 5: Customize (Optional)
- Some versions of Receiptify allow customization
- You might be able to adjust the time period
- Some options let you hide or show certain information
Step 6: Download Your Receipt
- Right-click on the receipt image
- Select “Save image as” or “Download image”
- Or use the download button if available
- Save to your device
Step 7: Share on Social Media
- Upload the image to Instagram, TikTok, Twitter, or other platforms
- Add a caption like “My Spotify receipt for this week 🎵”
- Watch the likes roll in!
Method 2: Mobile-Friendly Approach
For iPhone Users:
- Open Safari and visit the Receiptify website
- Log in with your Spotify account
- Take a screenshot of your receipt
- Or use the share/download options available
- Go to Photos and share to your desired platform
For Android Users:
- Open your mobile browser
- Navigate to Receiptify
- Log in with Spotify
- Use your phone’s screenshot feature
- Save and share from your gallery
How to Create Receiptify: Creating Your Own Version
Creating Your Receipt (Detailed Process)
Creating a Receiptify receipt is straightforward:
Basic Creation:
- Access the Tool – Visit receiptify.click or the official Receiptify site
- Authenticate – Connect your Spotify account securely
- Automatic Generation – The tool instantly generates your receipt
- Customization – Adjust settings if available (time range, format, etc.)
- Download – Save the generated image
- Share – Post to your preferred platform
What Information Appears on Your Receipt
Your Receiptify receipt typically includes:
- Header – “Receiptify” branding and aesthetic
- Date/Time – When the receipt was generated
- Song List – Your recent tracks (usually 10-20 songs)
- Artist Names – Credit to the original artists
- Visual Design – Receipt-style formatting with lines and text
Tips for Better-Looking Receipts
- Listen to Varied Music – More diverse songs look more interesting
- Fresh Activity – Generate during periods of active listening
- Quality Tracks – Well-known songs with proper Spotify data look better
- Screenshot Timing – Capture at optimal times when you have a good mix
Where to Find Receiptify: Accessing the Tool
Official Locations
Primary Receiptify Websites:
- receiptify.herokuapp.com – Original and most popular version
- receiptify.click – Alternative domain
- receiptify.com – May redirect to official version
How to Find It Safely:
- Use Google search: “Receiptify Spotify”
- Check official music blogs and tech websites for links
- Look for verified versions (check URLs carefully)
- Avoid third-party links or shortened URLs from unknown sources
Social Media Routes
You can also find Receiptify through:
- Instagram – Search #Receiptify to see examples
- TikTok – Popular creators share how-to videos
- Reddit – r/Spotify discussions often include links
- Twitter/X – Music enthusiasts regularly share their receipts
What to Avoid
❌ Don’t click suspicious links claiming to be Receiptify ❌ Don’t download apps claiming to be “Receiptify” from app stores ❌ Don’t trust shortened URLs without verification ❌ Don’t log into cloned versions of the website
How to Check Receiptify: Verifying Your Receipt
Checking if Your Receipt is Generated Correctly
Verification Checklist:
- ✓ All song titles are correct
- ✓ Artist names match your Spotify account
- ✓ Date/timestamp is current or recent
- ✓ Layout is properly formatted
- ✓ Image quality is good (not pixelated or corrupted)
Troubleshooting Issues
Receipt Not Generating:
- Clear your browser cache
- Try a different browser (Chrome, Firefox, Safari)
- Logout and login to Spotify again
- Refresh the Receiptify page
Songs Not Appearing:
- Make sure you’ve listened to music on Spotify recently
- Check if Spotify’s servers are updated
- Restart Spotify app
- Wait a few minutes and try again
Image Quality Issues:
- Use the browser’s native download feature
- Avoid taking screenshots if possible
- Try zooming in before downloading
- Check your internet connection quality
How to Get Multiple Receipts
You can generate multiple receipts by:
- Listening to different music at different times
- Refreshing the Receiptify page (shows different recent songs)
- Visiting the tool at different times of day
- Creating receipts to share different listening moods
How to Get Receiptify: Access Method
Getting Started (Quick Reference)
Fastest Method:
- Have a Spotify account ready
- Visit the Receiptify website
- Click “Login with Spotify”
- Allow permissions
- Download your receipt – Done!
Requirements You Need:
- 📱 Internet connection
- 🎵 Active Spotify account (free or premium)
- 🔗 Compatible web browser (Chrome, Firefox, Safari, Edge)
- ✓ Spotify listening history (at least some songs played)
Browser Compatibility
Works Best On:
- Google Chrome (Latest version)
- Mozilla Firefox (Latest version)
- Apple Safari (Latest version)
- Microsoft Edge (Latest version)
Mobile Browsers:
- Safari (iOS)
- Chrome (Android)
- Firefox (Android and iOS)
Spotify Account Requirements
You Need:
- ✓ Free Spotify account (no Premium needed)
- ✓ Active account with listening history
- ✓ Ability to authenticate via Spotify’s login
- ✓ Public listening permission (or temporarily enable it)
How to Make Receiptify: Complete Creation Tutorial
Full Step-by-Step Tutorial
Phase 1: Preparation
- Make sure you’re logged out of any previous Receiptify sessions
- Open your web browser
- Make sure your internet connection is stable
- Have your Spotify app open or ready
Phase 2: Authentication
- Navigate to the Receiptify website
- Look for the “Login with Spotify” button (usually prominent on homepage)
- Click the button
- You’ll be redirected to Spotify’s secure login page
- Enter your Spotify username/email and password
- Two-factor authentication (if enabled) – complete the verification
Phase 3: Permission Grant
- Receiptify will request permission to access your listening data
- Review the requested scopes carefully
- Click “Agree” or the equivalent authorization button
- You’ll be redirected back to Receiptify
Phase 4: Receipt Generation
- The page will load your recent listening history
- Your receipt will be automatically generated
- This usually takes 1-3 seconds
- The receipt displays songs from your last listening session
Phase 5: Customization (If Available)
- Some versions allow date range selection
- You might be able to hide certain information
- Layout options may be available
- Adjust according to your preferences
Phase 6: Download
- Locate the download button on the page
- Or right-click the receipt image → “Save image as”
- Choose your desired file format
- Select where to save on your device
- Click save
Phase 7: Social Media Sharing
- Open your preferred social media platform
- Create a new post
- Upload the downloaded Receiptify image
- Add caption (e.g., “Spotify Receiptify for [date]”)
- Add relevant hashtags: #Receiptify #Spotify #SpotifyReceipt
- Post and engage with comments
How to Find Receiptify: Discovery Guide
Finding in Search Engines
Google Search:
- Type “Receiptify” or “Receiptify Spotify”
- Click the official website from results
- Verify the URL before clicking
- Bookmark for future use
DuckDuckGo or Bing:
- Search “Receiptify Spotify tool”
- Look for the official site among results
- Check reviews or mentions before visiting
Finding Through Social Media
TikTok Discovery:
- Search #Receiptify
- Watch tutorials from music content creators
- Find links in video descriptions
- Click through to the official site
Instagram Guides:
- Search for “Receiptify tutorial”
- Follow accounts that feature Receiptify receipts
- Check their saved highlights for guides
- Read captions for official links
Reddit Communities:
- Visit r/Spotify
- Search “Receiptify” in subreddit
- Find discussion threads with links
- Check comments for helpful information
How to Make Receiptify on Spotify: Platform Integration Guide
Receiptify and Spotify Integration
How They Work Together:
- Receiptify reads your Spotify listening history via the official API
- It doesn’t modify anything on your Spotify account
- The connection is one-way (read-only)
- Your Spotify data remains secure and unchanged
Before You Start:
Check Your Spotify Status:
- Open Spotify app on any device
- Play a few songs to create recent history
- Make sure your account is active
- Verify your login credentials work
Optimal Time to Use:
- After listening to several songs
- When you have a good mix of tracks
- Not immediately after starting Spotify
- When you want to capture your current taste
The Integration Process:
- Visit Receiptify
- Click “Connect Spotify” or “Login with Spotify”
- You’ll see Spotify’s authorization dialog
- Review what Receiptify can access
- Click “Allow” or “Authorize”
- Receiptify pulls your current listening data
- Your receipt is instantly created
What Spotify Sees:
- Receiptify’s authorization in your connected apps list
- You can revoke access anytime from Spotify settings
- No impact on your Spotify recommendations or algorithms
- No tracking of your Receiptify activity on Spotify
What is Spotify Receiptify? (Different Angle)
Receiptify as Part of Spotify Ecosystem
Receiptify exists outside the official Spotify app but has become part of Spotify’s cultural phenomenon. It’s a third-party tool that:
- Works with official Spotify API
- Is not owned by Spotify
- But is widely associated with Spotify culture
- Represents the sharing and social aspects of modern music listening
Why Spotify Users Love It
Music Discovery:
- See what friends are listening to
- Discover new artists from others’ receipts
- Build community around music taste
Personal Expression:
- Show off your music taste
- Create shareable moments
- Join viral trends
Cultural Moments:
- Participate in Spotify Wrapped season
- Create content year-round
- Join music community conversations
Is There Receiptify for Apple Music? Alternative Tools
Apple Music Alternatives
Unfortunately, there’s no official “Receiptify” for Apple Music, but here are alternatives:
Option 1: Last.fm
- Connects to Apple Music
- Provides detailed listening statistics
- Offers shareable reports
- Free and premium versions available
Option 2: Stats for Spotify (Alternative)
- Works with Spotify only
- Similar receipt-style display
- Enhanced statistics options
- May have Apple Music version in development
Option 3: Obscurify Music
- Works with Apple Music and Spotify
- Generates visual statistics
- Creates shareable images
- Different aesthetic than Receiptify
Option 4: Maroofy
- Music recognition and sharing tool
- Works across platforms
- Create custom shareable receipts
- Cross-platform compatible
How to Get Apple Music Receipts:
Manual Method:
- Screenshot your Apple Music stats
- Use graphic design tools to create receipt-style images
- Share on social media
Using Alternative Tools:
- Set up Last.fm account
- Connect Apple Music to Last.fm
- Generate shareable statistics
- Download and share
How to See Receiptify: Viewing and Display Tips
Viewing Your Generated Receipt
On Website:
- Receipt appears automatically after login
- Displayed in center of screen
- Usually shows in receipt format
- Readable on any device size
On Mobile:
- Site is mobile-responsive
- Receipt may be slightly smaller
- Scroll to see full receipt
- Download option available
Tips for Better Viewing:
- Zoom in for readability
- Use full-screen mode if available
- Take screenshot for sharing
- Check on multiple devices
Viewing Others’ Receipts
On Social Media:
- Search #Receiptify hashtag
- Explore shared receipts
- Comment and engage
- Get inspired for your own
In Group Chats:
- Ask friends to share their receipts
- Compare music taste
- Discover new songs
- React with emojis
What Does Receiptify Mean? Understanding the Concept
The Meaning Behind the Name
“Receiptify” = “Receipt” + “Spotify”
The name perfectly captures the tool’s function: turning your Spotify listening into a receipt-style image.
Cultural Significance
Musical Expression:
- Represents how we share music in the digital age
- Shows personal taste and identity
- Facilitates music discovery among friends
- Part of broader social media culture
The Analogy: Just as shopping receipts are proof of purchase, Receiptify receipts are:
- Proof of your music taste
- Evidence of your listening habits
- A receipt for your “purchase” of entertainment
- A snapshot of your musical preferences
Why It Resonates:
- Nostalgic appeal (remember paper receipts?)
- Unique visual format
- Easy to share and understand
- Fits modern social media sharing culture
Receiptify vs Receptify: Clearing the Confusion
Common Spelling Mistakes
Correct Spelling: RECEIPTIFY Common Misspellings:
- Receptify (most common)
- Receipfy
- Recepify
- Receipify
Why the Confusion:
- Similar sound when pronounced
- Easy typo mistakes
- Autocorrect sometimes changes it
Always Search For: ✓ “Receiptify” (with an “E” in receipt) ✓ Not “Receptify”
Receiptify FAQ: Quick Answers
Q: Is Receiptify free? A: Yes, completely free. No subscription required.
Q: Do I need Spotify Premium? A: No, works with free Spotify accounts too.
Q: Is my password safe? A: Yes, you never give Receiptify your password, only authenticate through Spotify.
Q: How often can I generate receipts? A: Unlimited times. Generate as often as you listen.
Q: Does Receiptify store my data? A: It pulls temporary data to generate the image only.
Q: Can others see my listening history? A: Only if you share the receipt image. Your Spotify data remains private.
Q: Why aren’t all my songs showing? A: Receiptify shows recent plays, typically last 24-48 hours.
Q: Can I customize the receipt? A: Limited customization available, depending on the version.
Q: Is Receiptify official? A: No, it’s a third-party app, but uses official Spotify API.
Q: What if Receiptify stops working? A: Alternative similar tools are available online.
Conclusion: Start Creating Your Receiptify Today
Receiptify is an amazing, safe, and easy way to share your Spotify listening habits with the world. Whether you want to discover what your friends are listening to, show off your music taste, or simply have fun with a creative tool, Receiptify delivers.
Quick Recap: ✅ Safe to use with official Spotify authentication ✅ Accurate representation of your recent listening ✅ Free and no technical skills required ✅ Perfect for social media sharing ✅ Works on mobile and desktop ✅ Helps with music discovery
Get Started Now:
- Visit receiptify.click (or official Receiptify)
- Click “Login with Spotify”
- Allow permissions
- Download your receipt
- Share to social media
- Enjoy!
Join thousands of music lovers who are already sharing their Receiptify receipts. It’s time to turn your Spotify listening into shareable moments!